Overview
The Classic Survival Horror Camera System provides plug and play camera features for Unreal Engine 4, reminiscent of classic fixed camera survival horror games. More specifically, it provides a scalable approach to a ‘fixed camera’ game by utilising a Camera Trigger blueprint that easily maps camera changes, whilst also resolving the functional limitations associated with the standard ‘trigger box’ approach for achieving fixed cameras found within the Unreal Engine documentation.
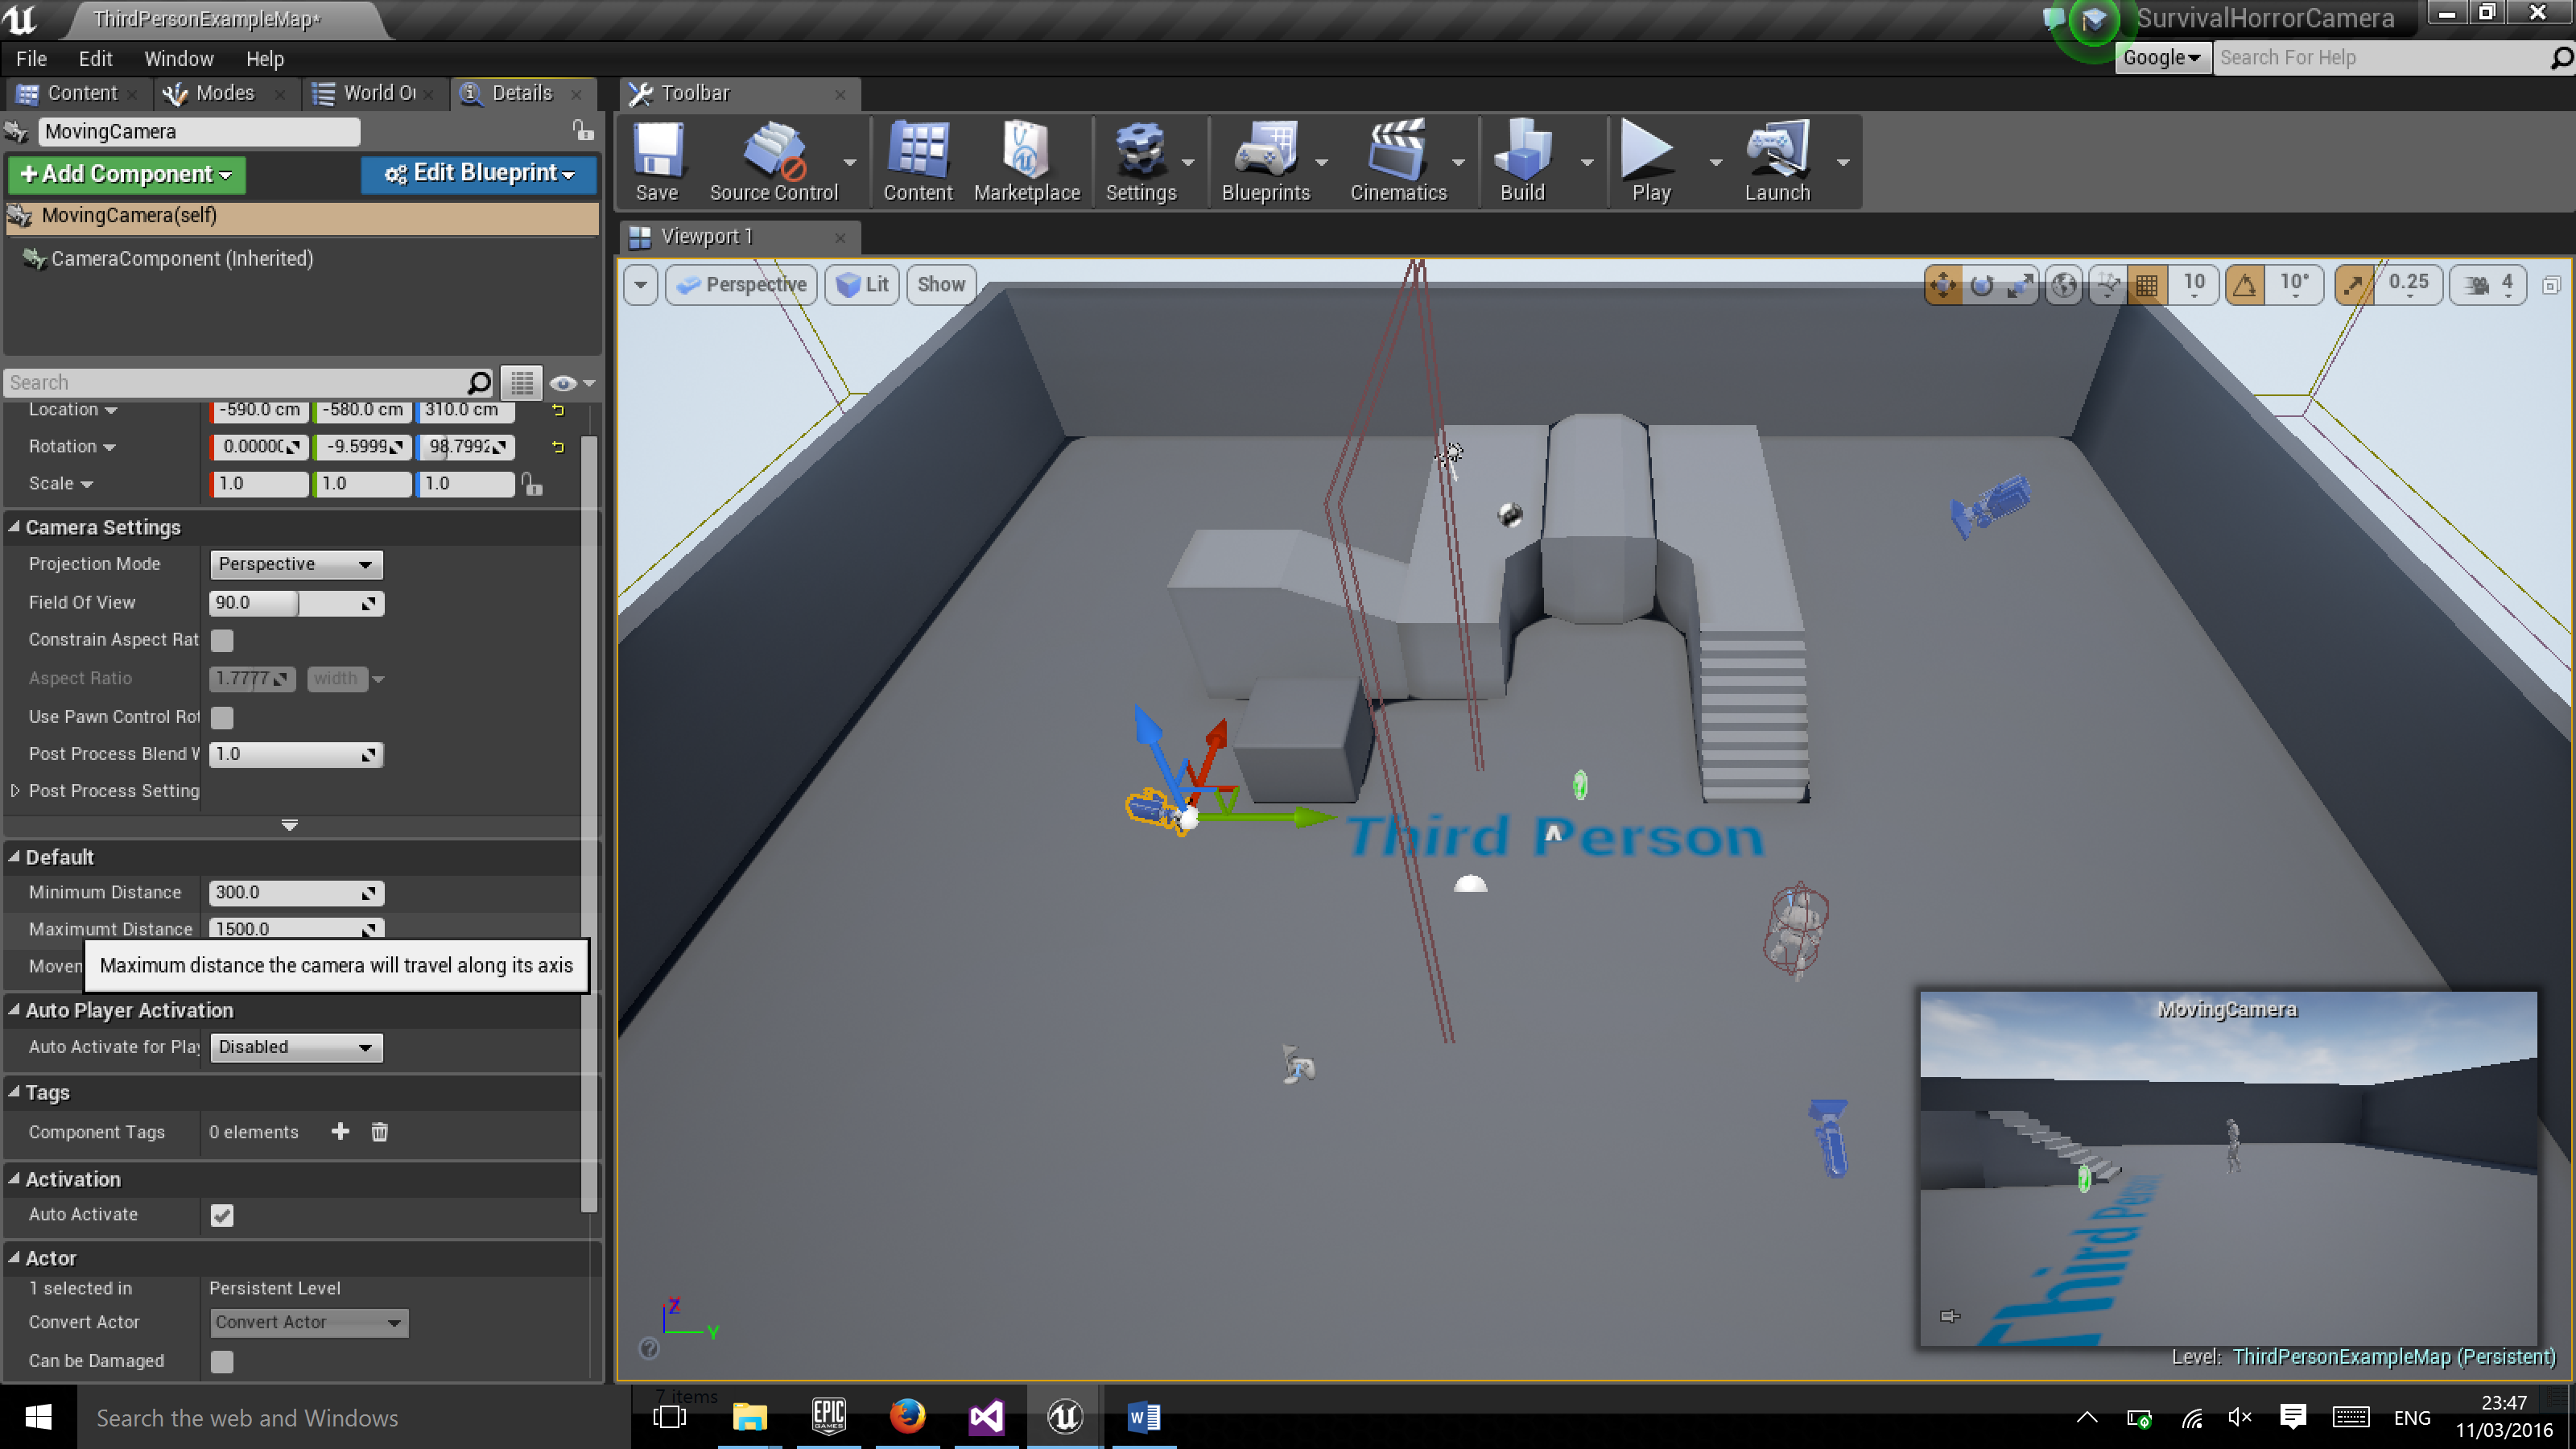
In addition, the Classic Survival Horror Camera System provides four Camera Blueprint variations to really bring scenes to life; a Rotating Camera that rotates to follow the player pawn, a Single Axis Moving Camera which follows the player pawn along a single axis within prescribed bounds, a Single Axis Moving Camera that also rotates to follow the player, and of course a Fixed Camera with a static view point.
The Classic Survival Horror Camera System is available to purchase online now for $5.95 from the Unreal Engine Marketplace here.
Getting Started
Using the Classic Survival Horror Camera System couldn’t be easier; getting started is as simple as adding an interface and some functions into your player pawn, then away you go placing cameras and camera triggers in your level. Associating cameras to camera triggers is just a simple configuration change (object selection) and then for each camera object, you can tweak some performance settings (movement bounds, rotation speed etc).
Intergrating with your Player Blueprint
In order to intergrate the Classic Survival Horror Camera System with your exisitng Player Blueprint, the following steps should be followed:
-
Open your Player Pawn Blueprint class and add the Camera Interface which can be found in the Classic Survival Horror Camera System content folder.
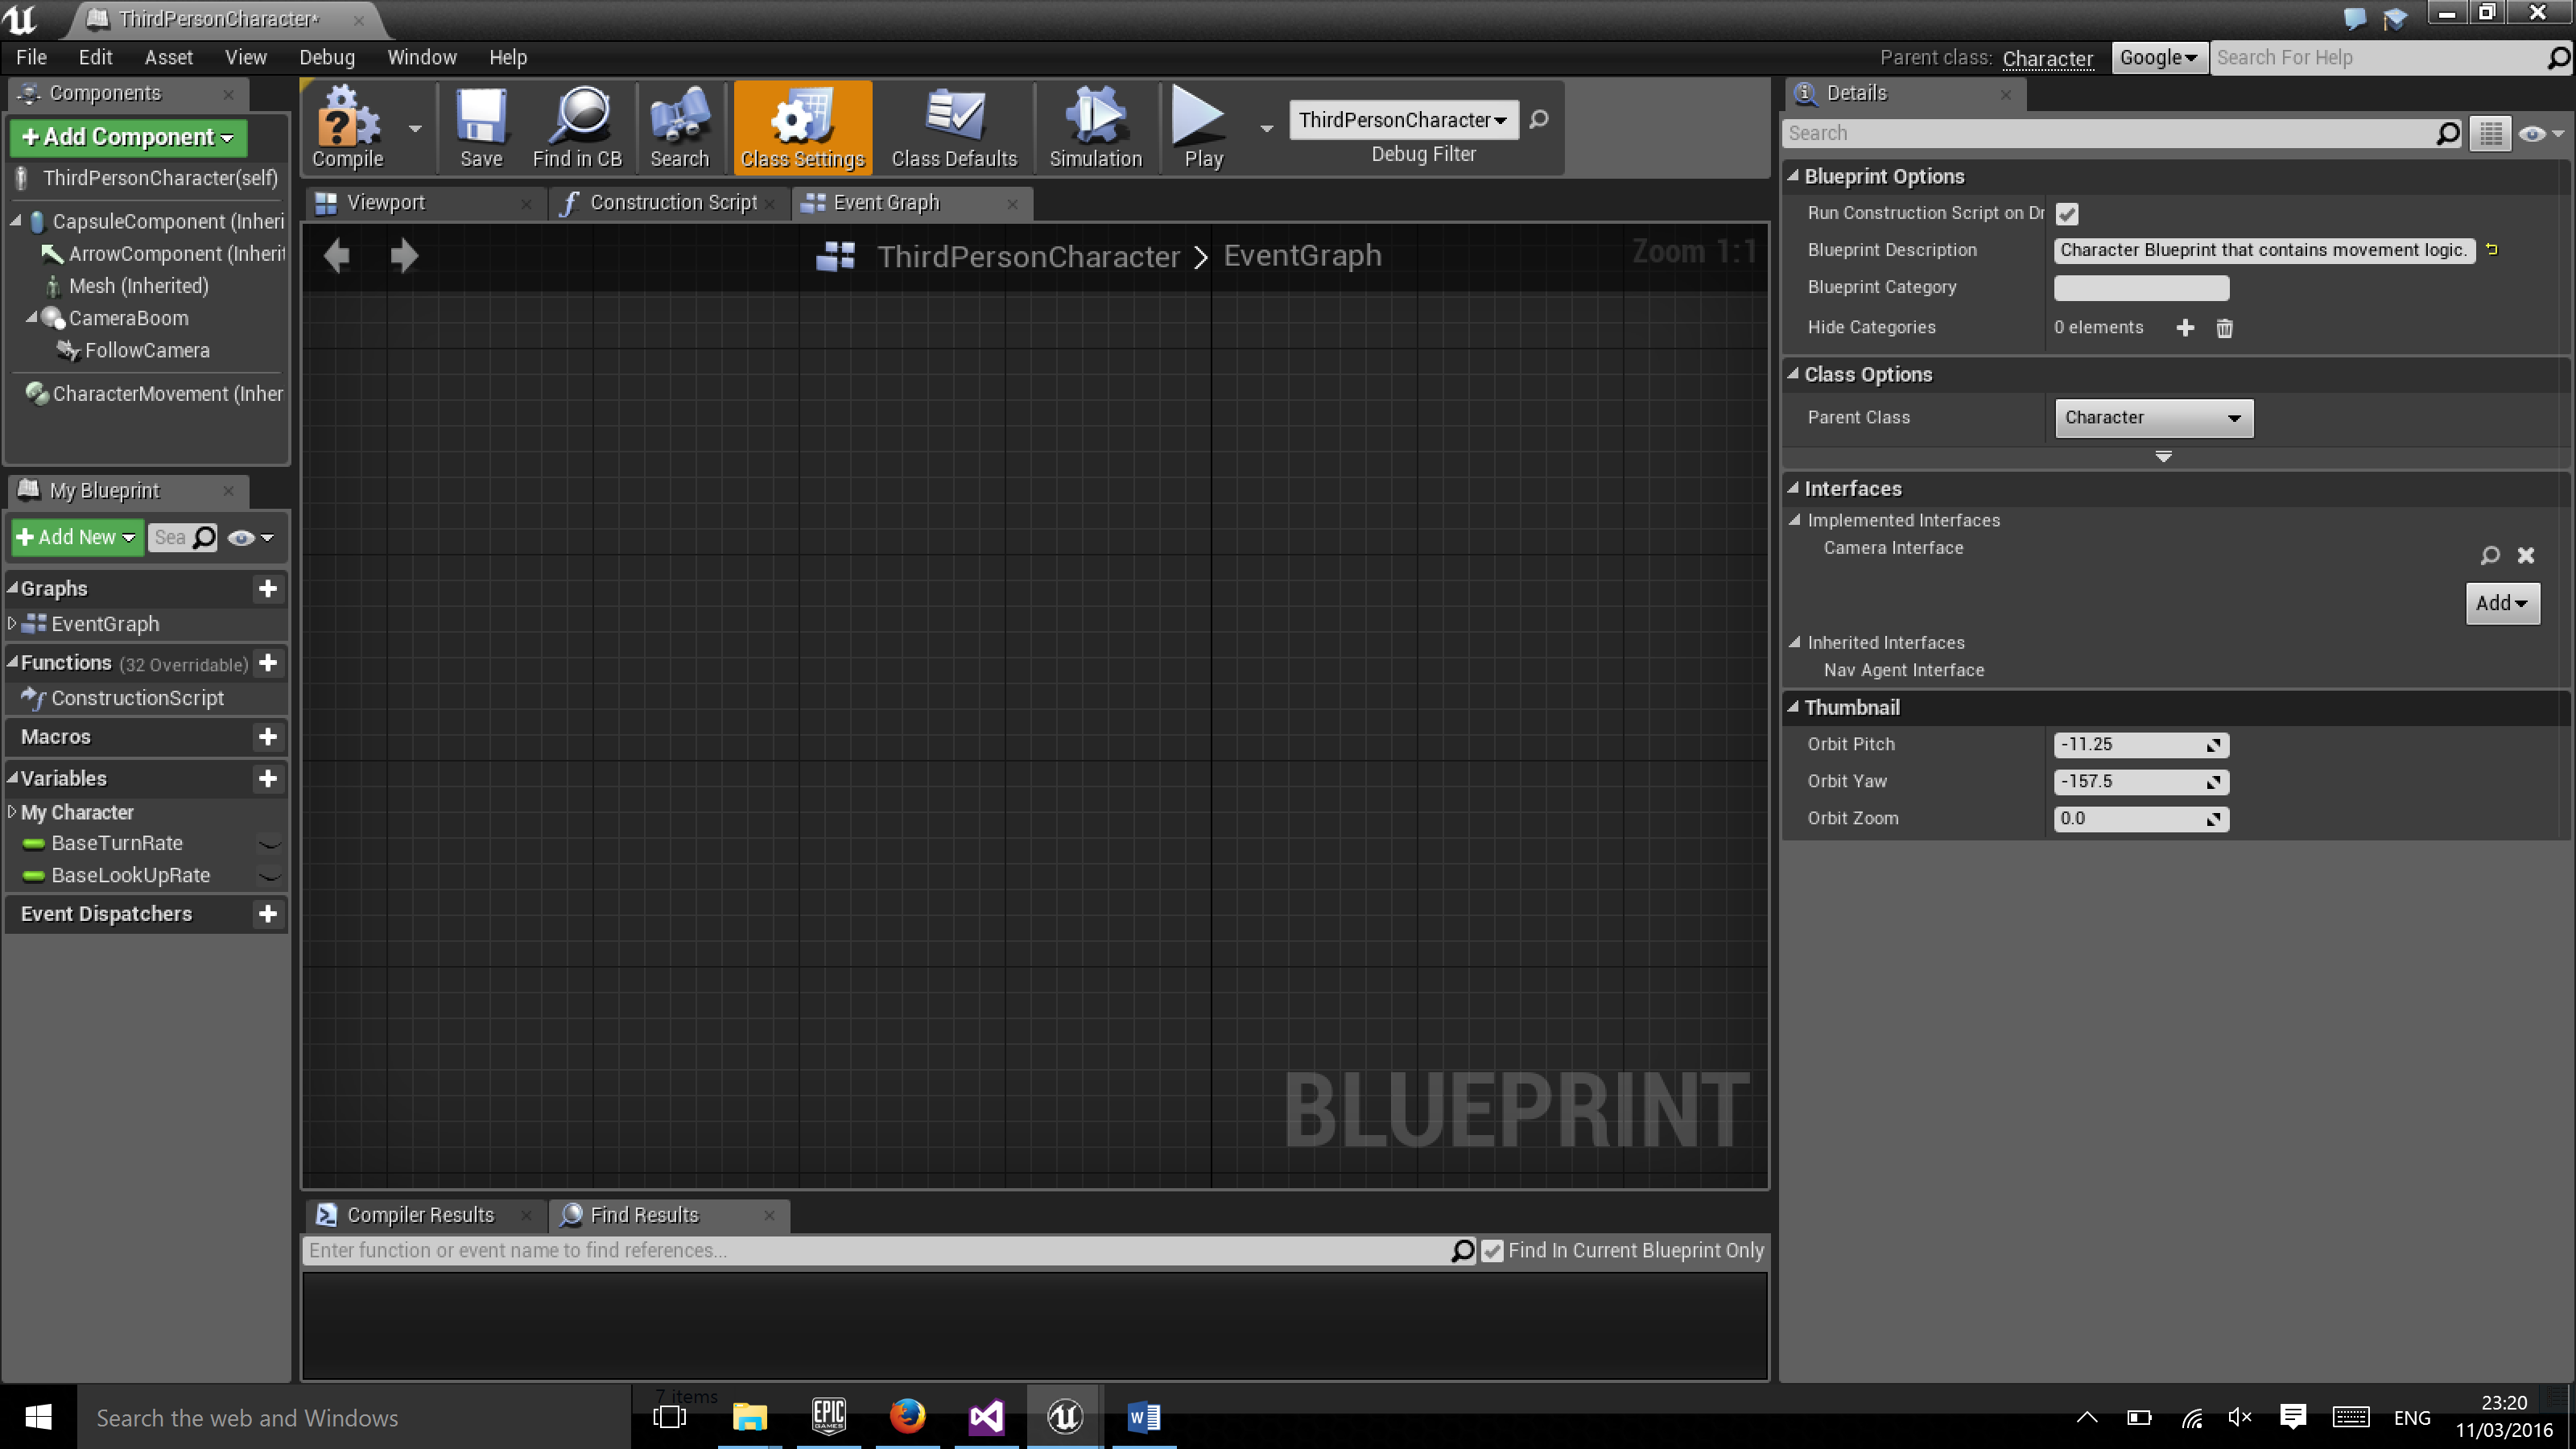
-
Next, add a Camera Actor variable to store a reference to the active camera.

-
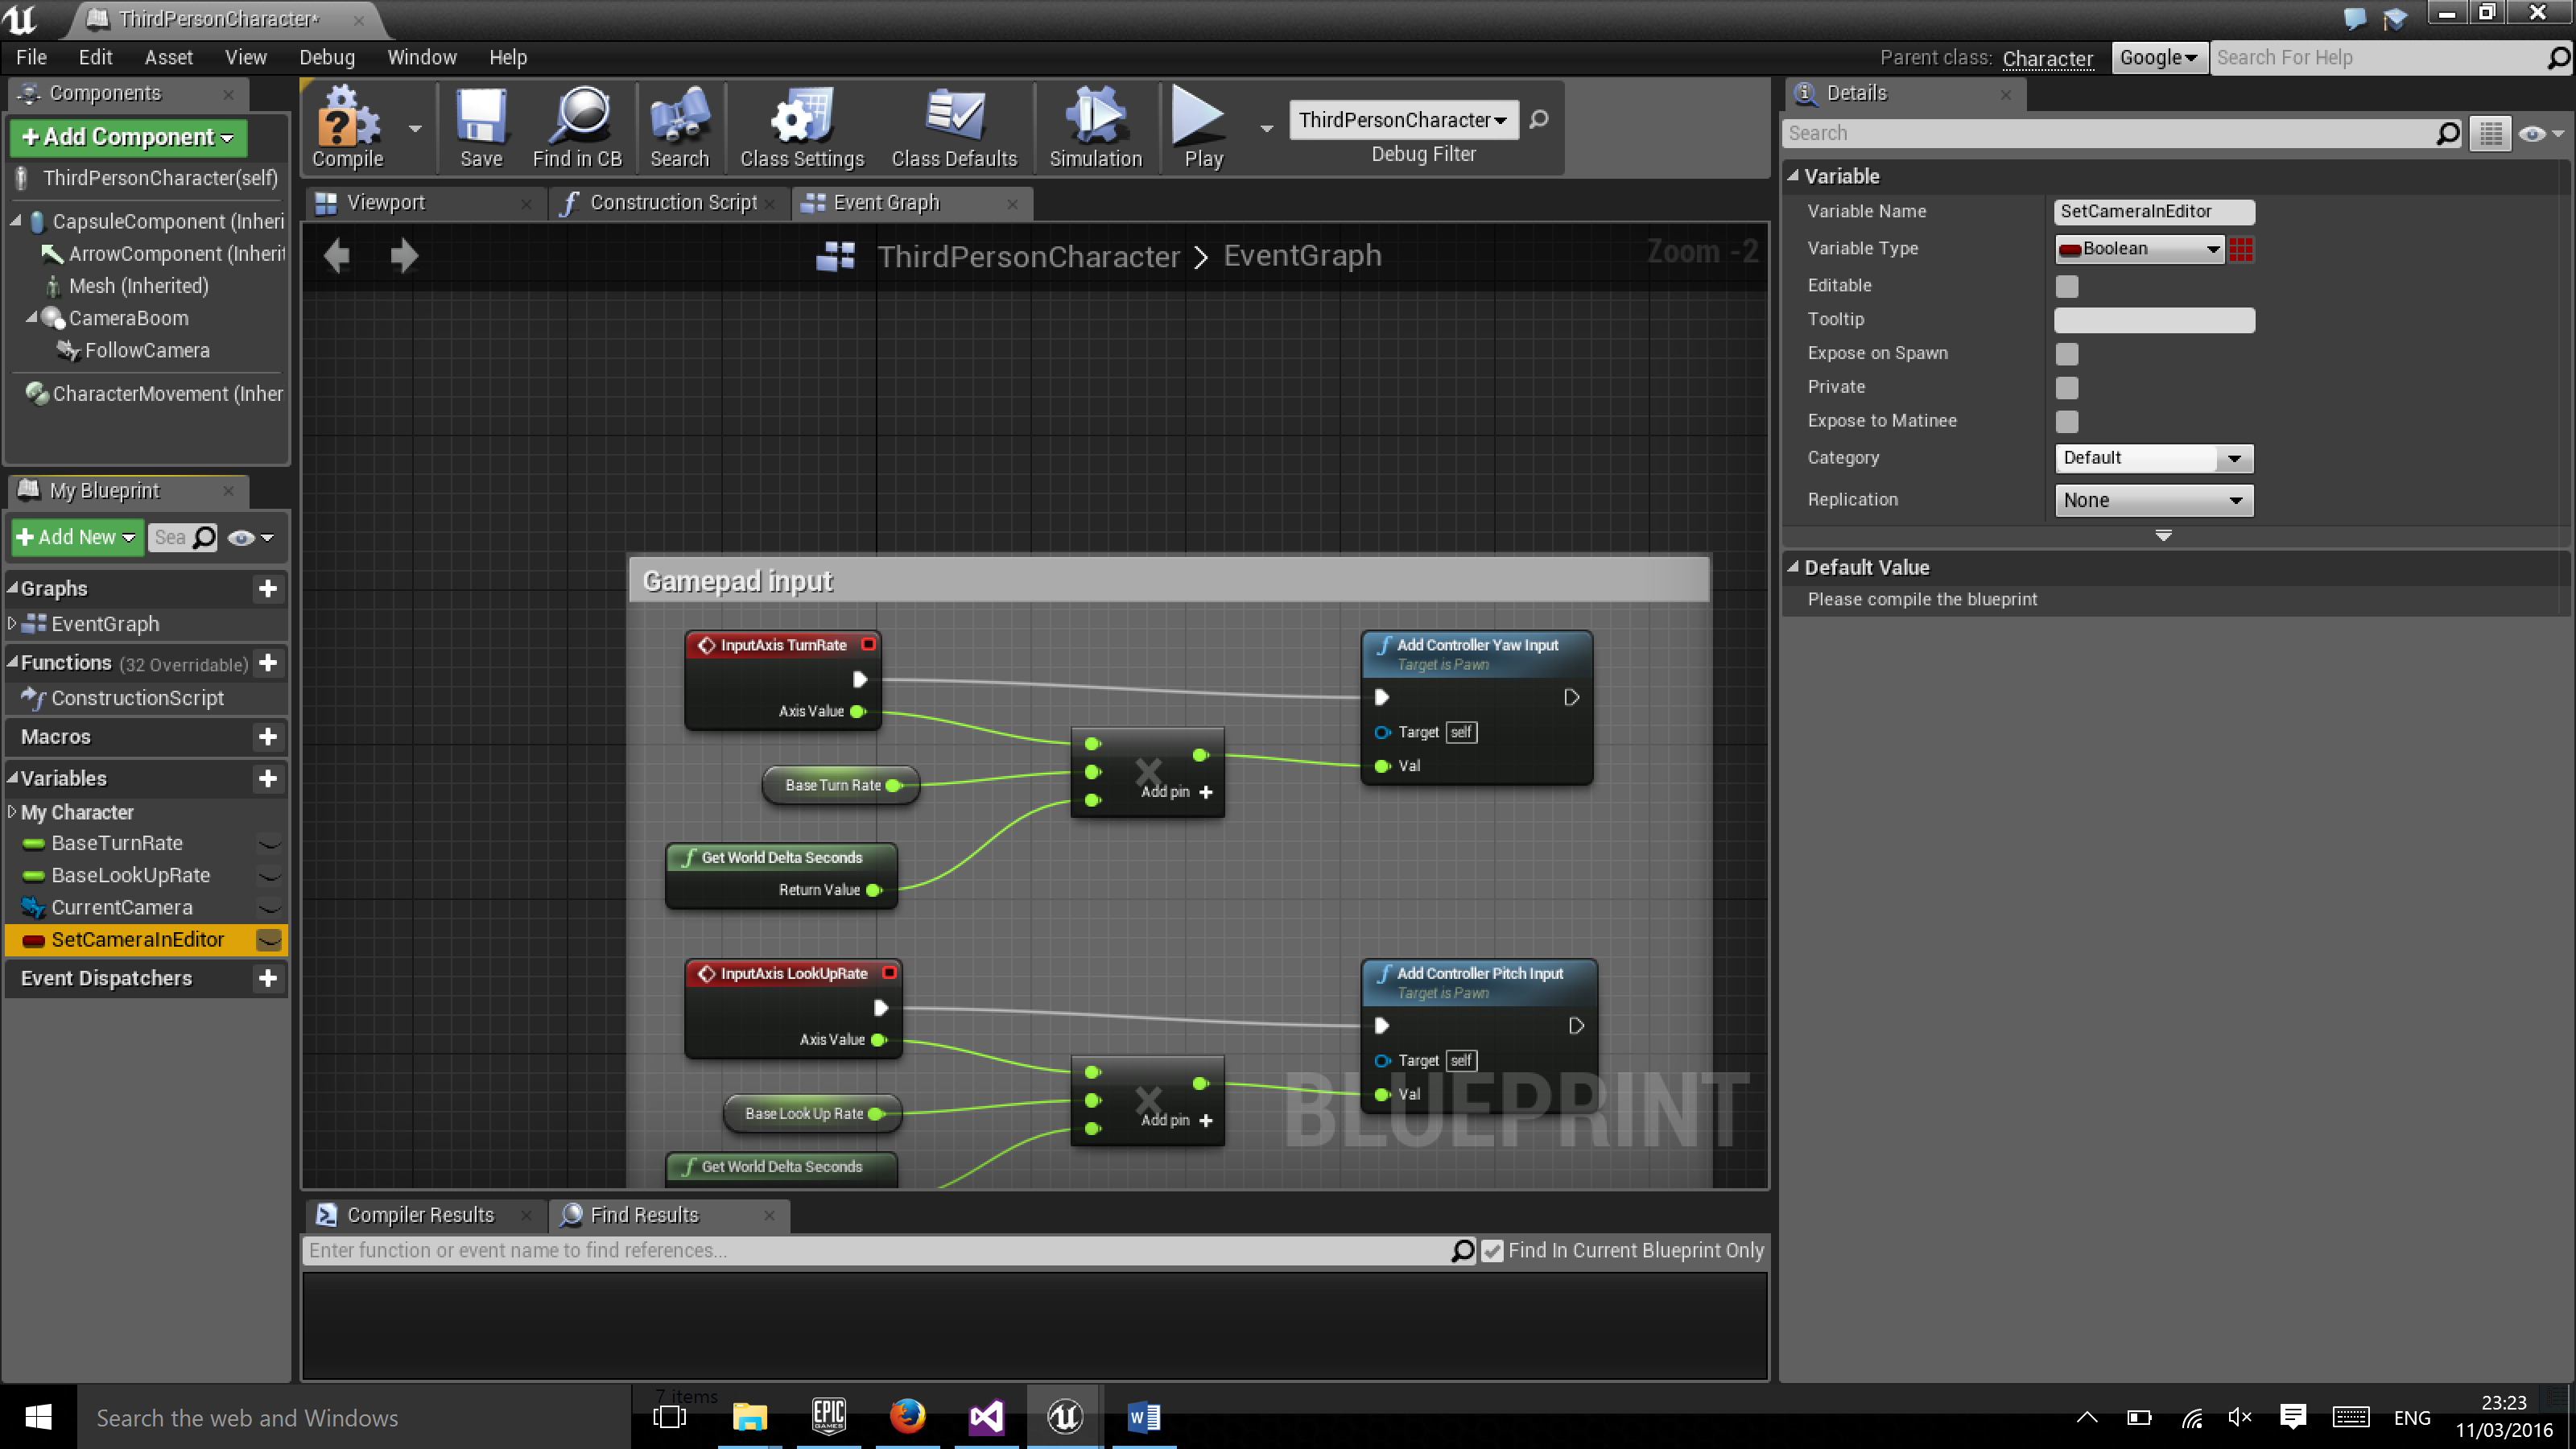
Similarly, add a Boolean variable to capture how the first camera is set.
-
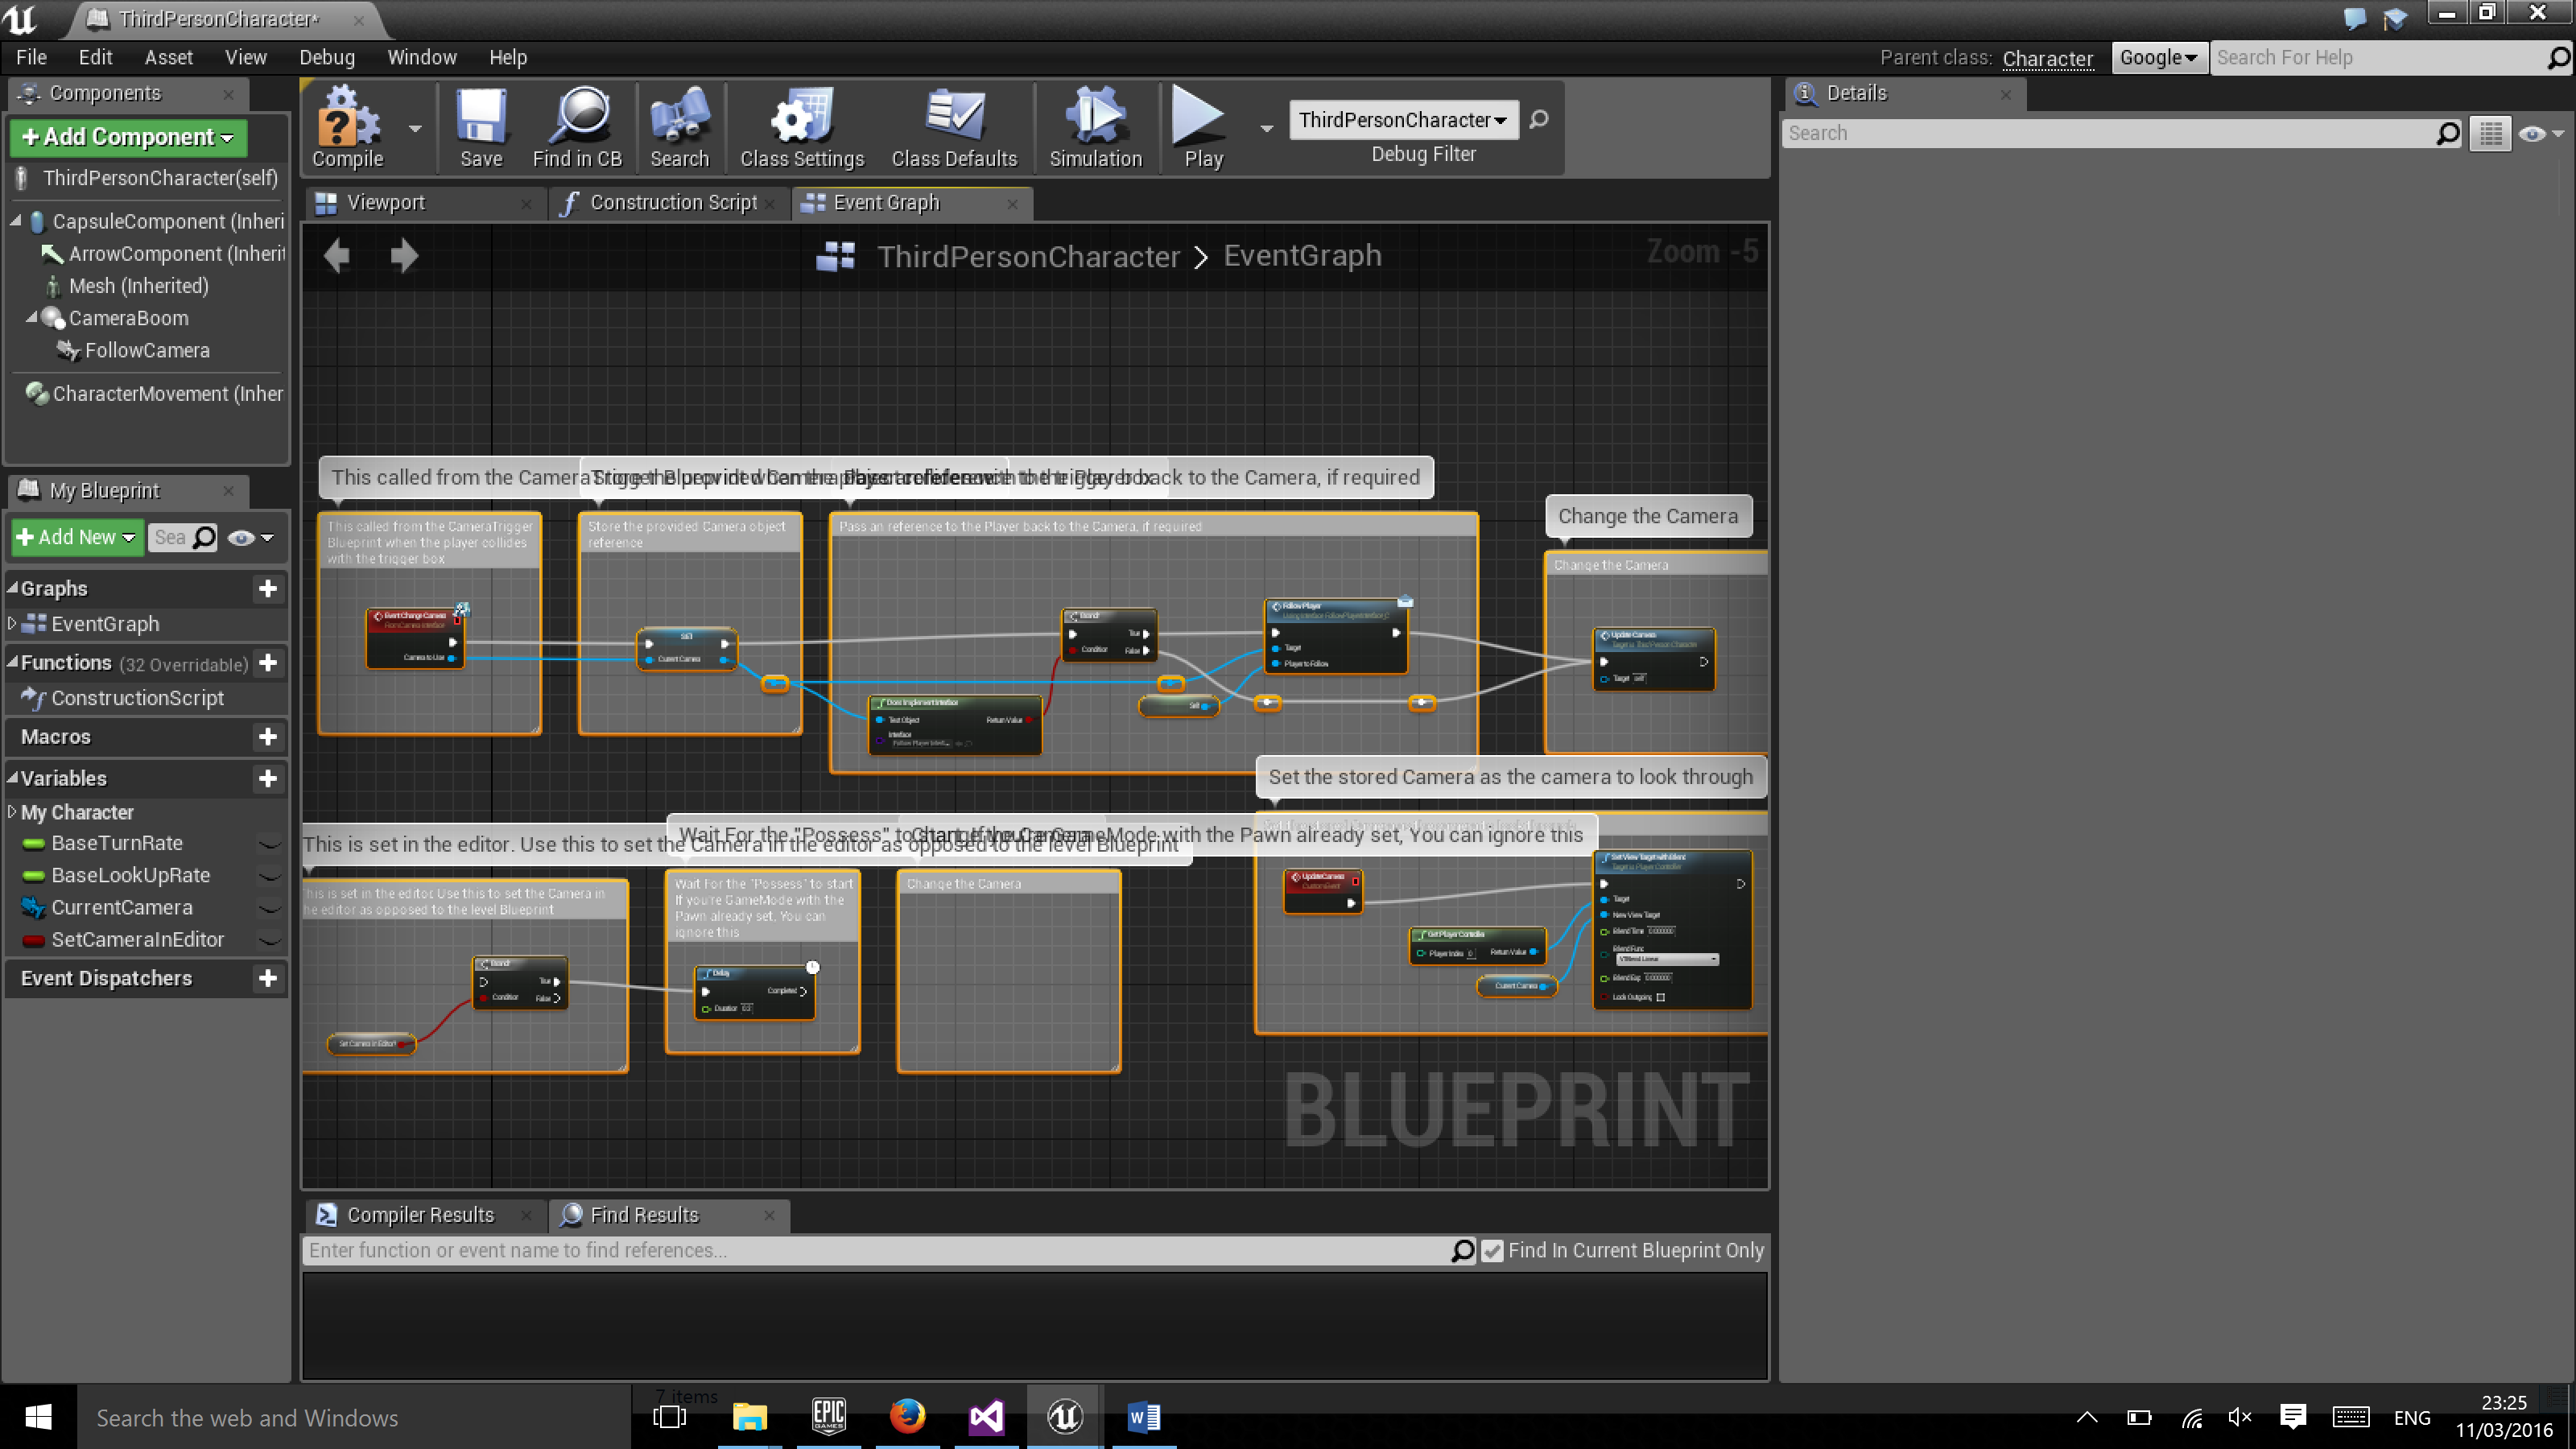
Now it's time to add the code from the Classic Survival Horror Camera System sample Player Blueprint class. Simply open up the sample class and select all the camera functionlity at the top, then copy paste it into your own Player Blueprint.
-
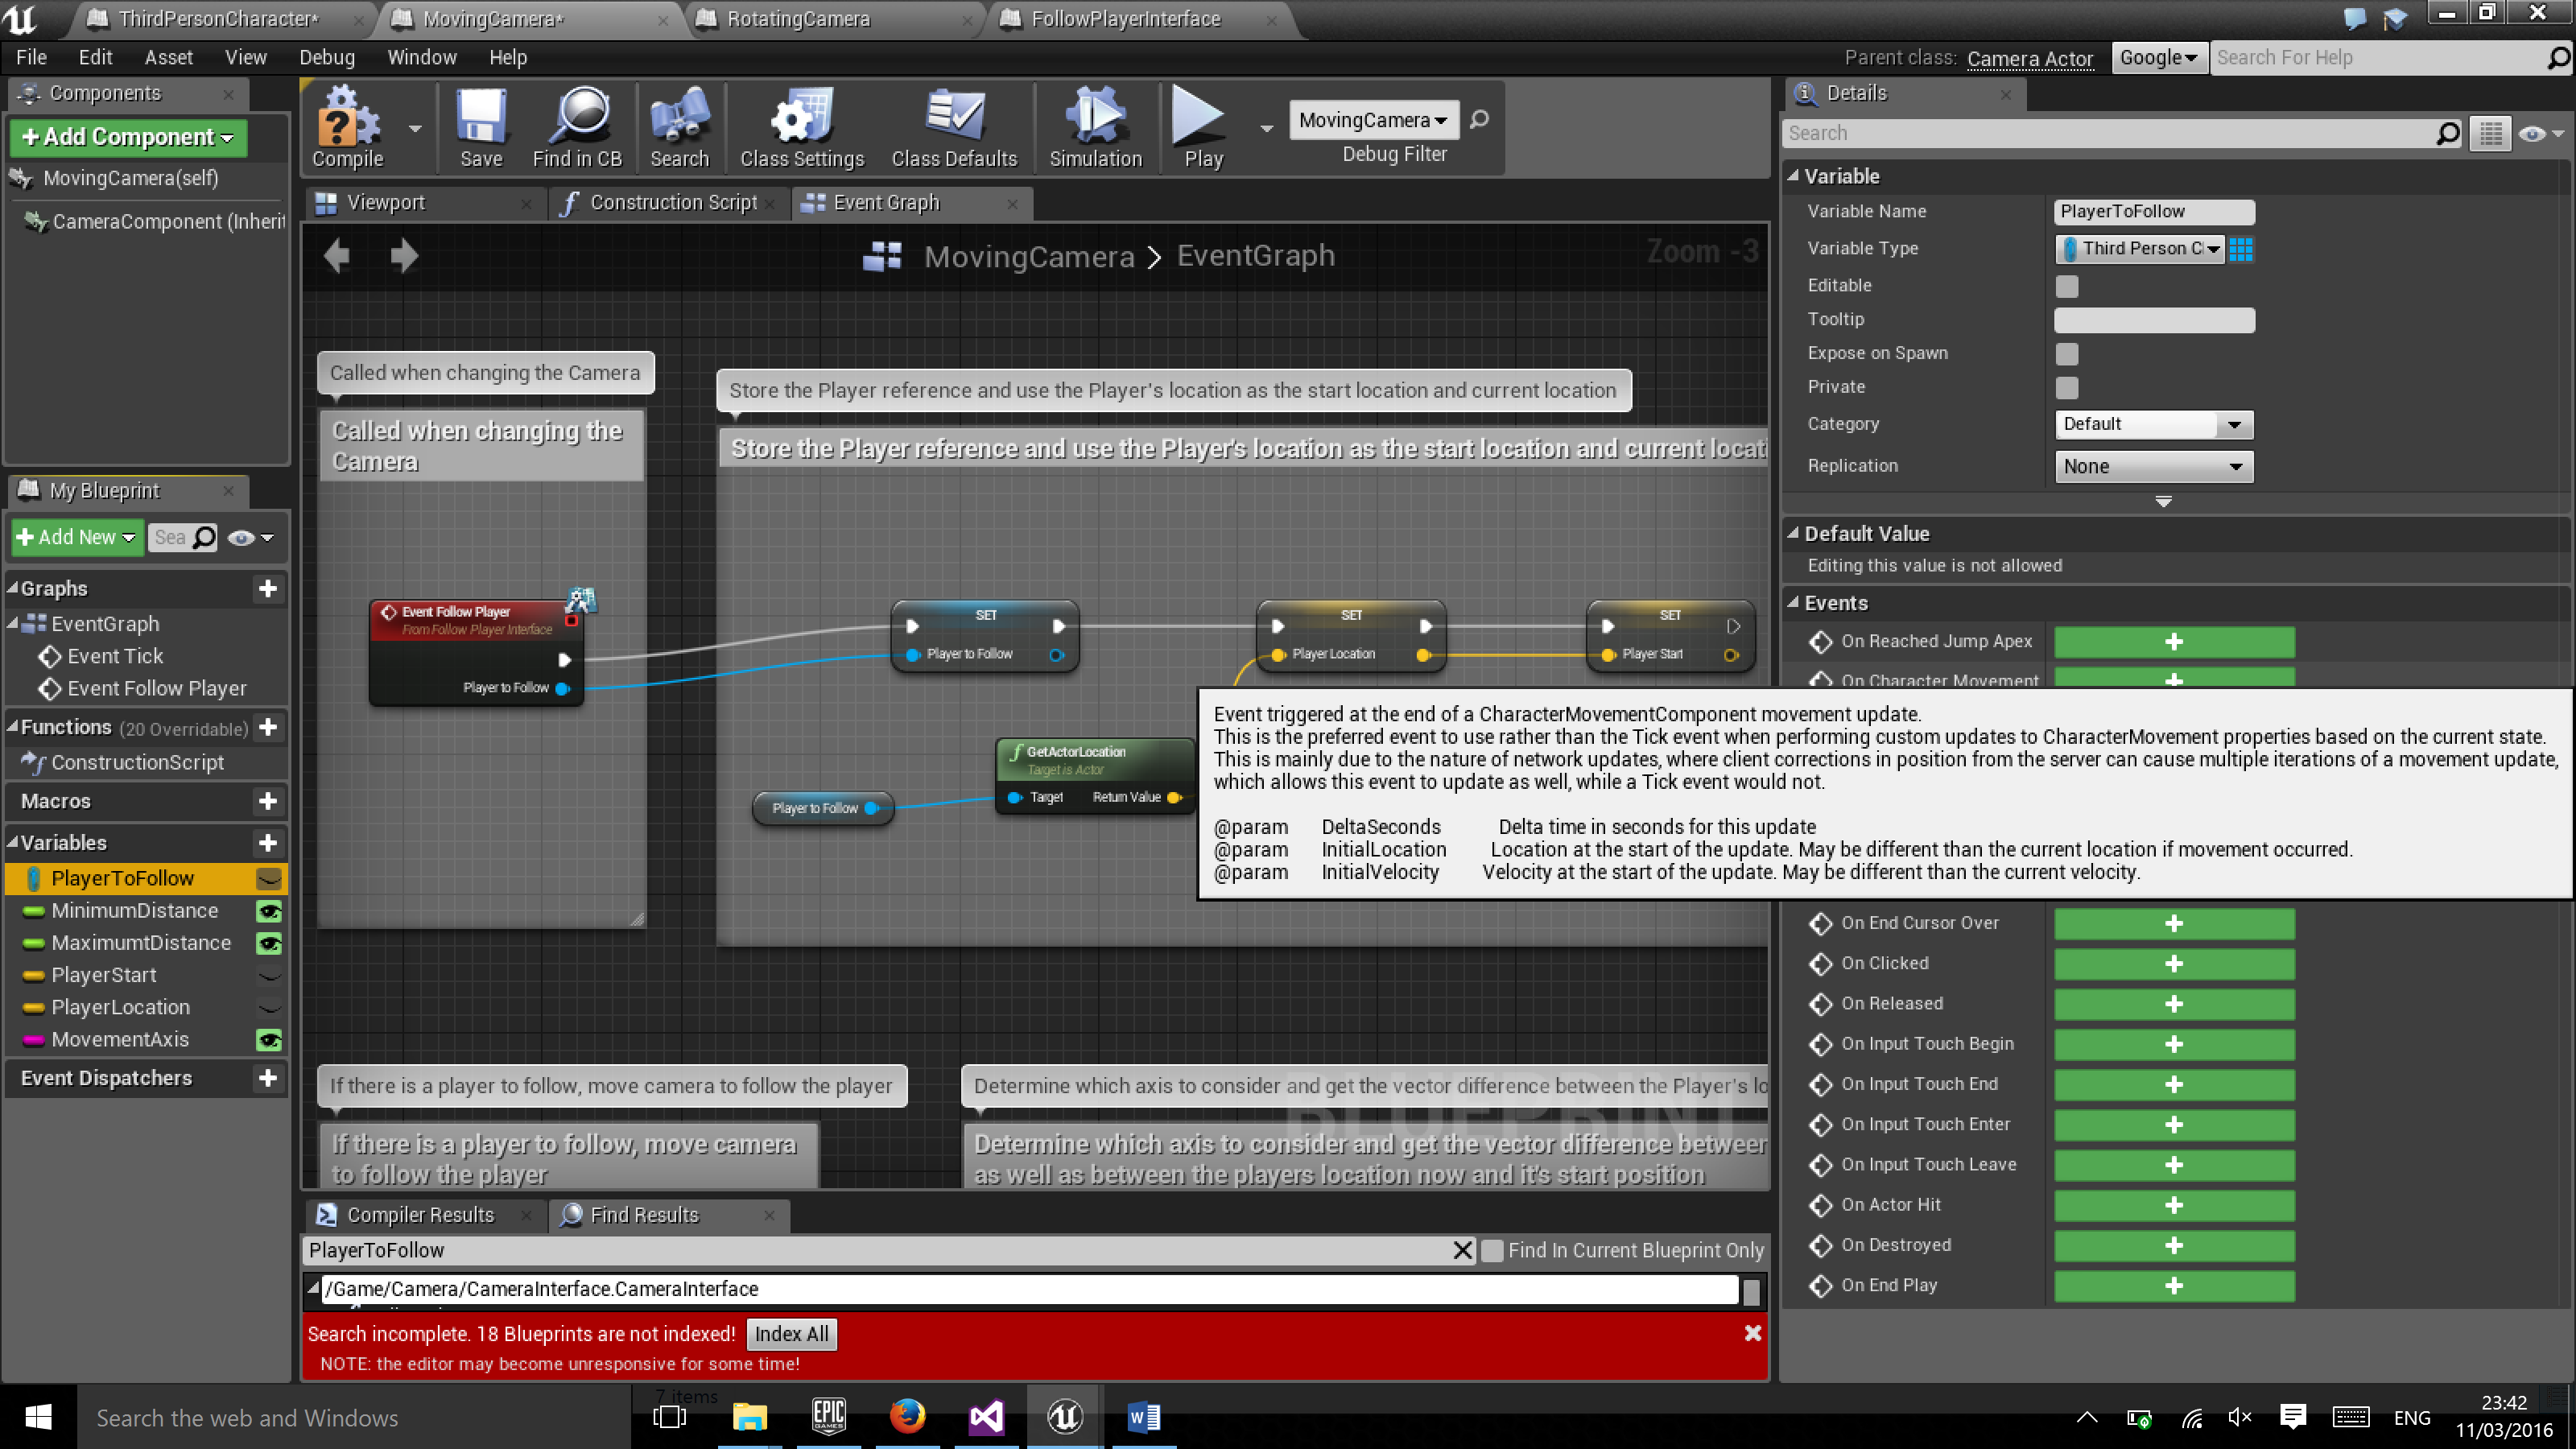
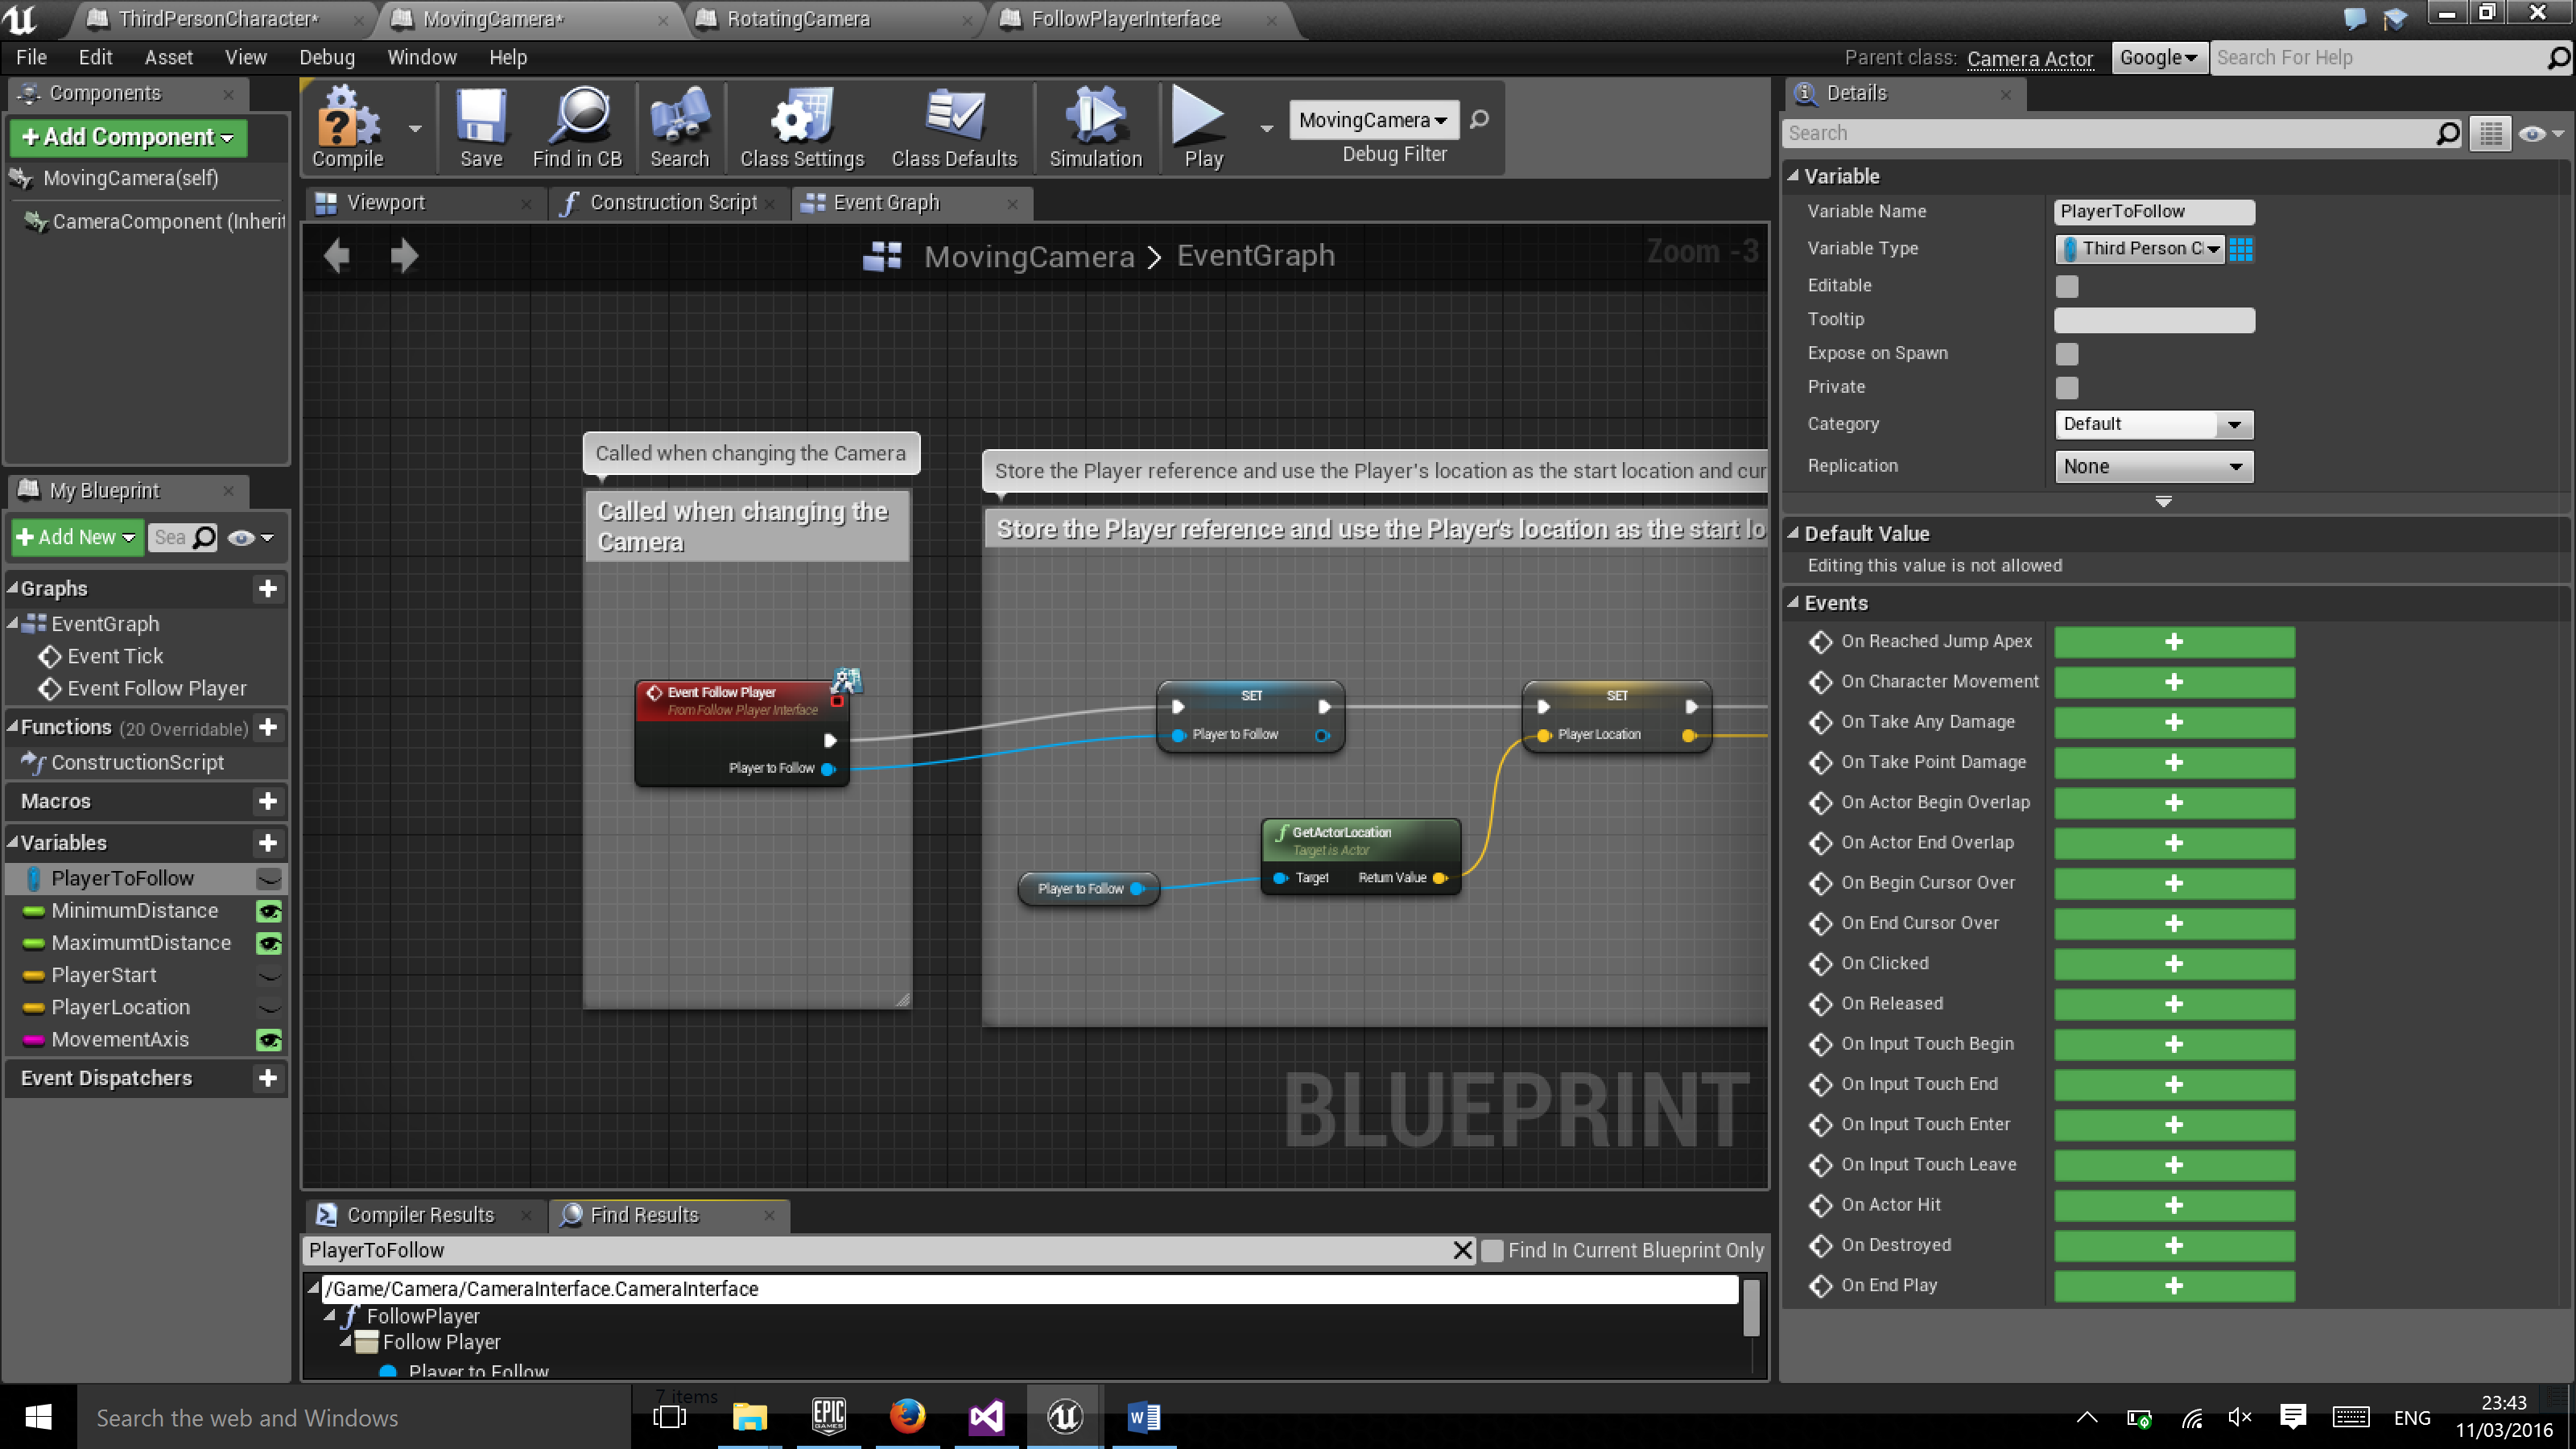
Open the PleyerToFollow Interface which can be found within the Classic Survival Horror Camera System content folder and change the variable type to be your Blueprint player class.
-
Similarly, open the Moving Camera Blueprint and Rotating Camera Blueprint which can be found within the Classic Survival Horror Camera System content folder. Inside both classes, change the variable type of the PlayerToFollow variable to be your Player Blueprint class.
You may also need to re-add the FollowPlayer event in the Moving Camera and Rotating Camera Blueprints if the variable change has not filtered through. To do this simply delete the event and add it again.
- That's it, your all set and ready to start adding Cameras and Triggers to your game, since they will now respond to your Player Pawn.
Usage
Using the Classic Survival Horror Camera System is extremely straight forward; simply place Camera Triggers and Camera objects into your level using the following steps:
Adding Cameras
- Initially, it is necessary to place one Camera Trigger instance and two Camera objects of any type (fixed, moving or rotating) into the level, all of which can be found within the Classic Survival Horror Camera System content folder.
-
Select the Camer Trigger object and set the Cameras to use as the two Camera objects you placed into the level.

-
When using the Moving Camera it is also recomended that you edit the settings for the camera instance to make sure it moves along the axis you wish and starts/stops moving appropriatly for your level.